 It seems like every year, Xmas gets more and more plastic! I think it's time for a change... Let's create some new traditions that honour each other and our beautiful planet. Instead of spending hours and hours of shopping for bag-fulls of disposable plastic tat, give one small meaningful gift instead.
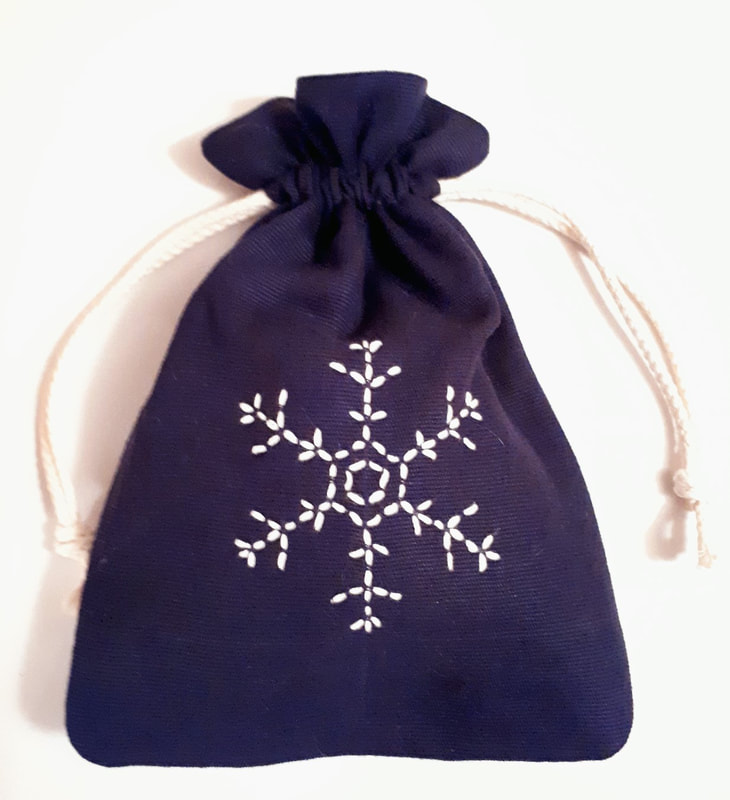
Here's a sustainable gift from me to you - this Snowflake Gift Bag can be made in an evening, filled with sweets or bath time treats, or something more significant, and placed under the Xmas tree. It can be used again next year. Why not make one gift bag for each member of your family with their name embroidered on the back, and create a new Xmas day tradition for your family? Instead of spending time unwrapping unwanted gifts and forcing fake smiles, take some time to rejoice in each others good qualities instead, and remember the good times that you've had with each other in the past year. This is a great way to connect with each other, and it increases positivity and mental well being, which can be in short supply at this time of year. Click here to download your free pattern and tutorial. Merry Xmas! Tara xx
0 Comments
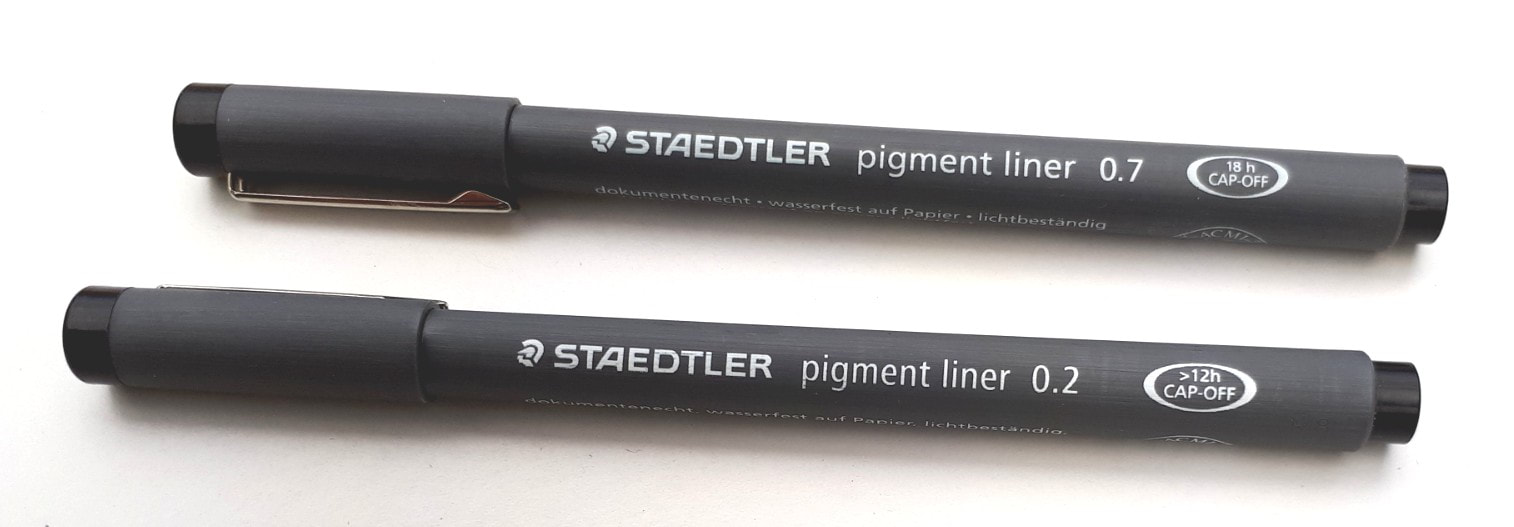
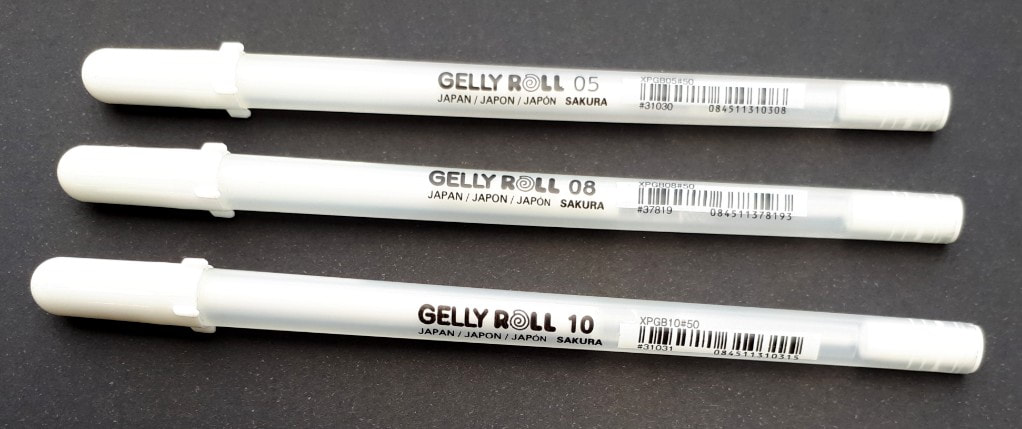
Transferring a design onto your fabric can be tricky, but having the right marking tool for the job makes a huge difference! You can use a light box (or window) to transfer any line drawing on to fabric, but which is the best pen to use? Leaving a Permanent Mark...If you want a very clear, precise line that's going to last the length of your project, you can't beat using pens that leave a permanent mark. Of course, you have to make sure that you will stitch over the design, completely covering the lines, otherwise they will show through in your finished work. You can use gel pens (including white) or pigment pens to trace over your design leaving a clear precise line to stitch over. I use Gelly Roll pens (White) and Staedtler Pigment Liners (Black) 0.2 & 0.7 mm
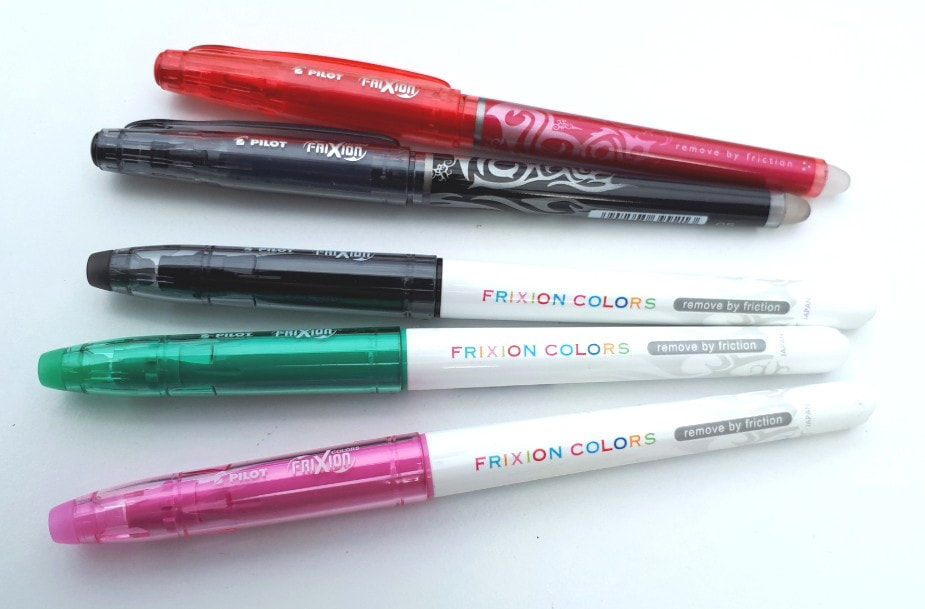
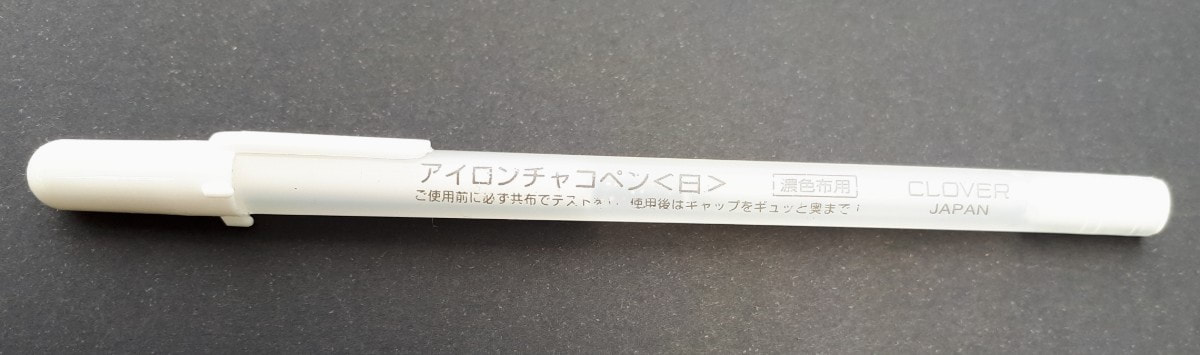
Iron it off...If you want to use an eraseable pen the best ones are Frixion pens either roller ball (thin) or colouring pens (thick), they are both available in a range of colours suitable for marking most colours of fabric. If you want to make an eraseable mark on black, or very dark fabrics then you'll need to use a Clover Sashiko Marker Pen (White). These are designed for marking Japanese Sashiko Quilting patterns, and they leave a clear, precise line. The only drawback is the line doesn't show up until the ink is dry, so you have to be patient. The line appears after a couple of minutes, and gets more intense over about an hour or two. These are both heat/steam erasable, so you just need to hover an iron over the fabric and the line disappears, so MAKE SURE YOU IRON YOUR FABRIC BEFORE MARKING IT! They also leave a mark (like a shadow) on silk and viscose, so test them on a scrap piece of fabric first.
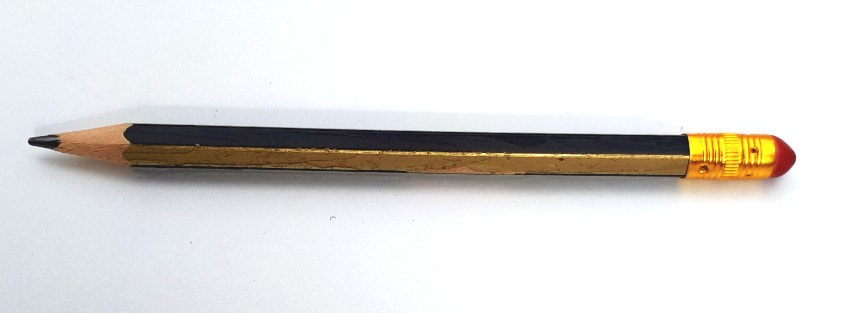
Oh, my it's Humid...Water (Turquoise) and Air (Purple) erasable pens are best saved for dressmaking, where the whole garment is designed to be washed, and the marks aren’t required for long periods of time. Turquoise marks can be hard to remove without washing. Both types of pen will fade due to the humidity in the air over hours/days (Air erasable) or months (Water erasable). They also make a thick mark which is not accurate enough for small embroidered motifs. 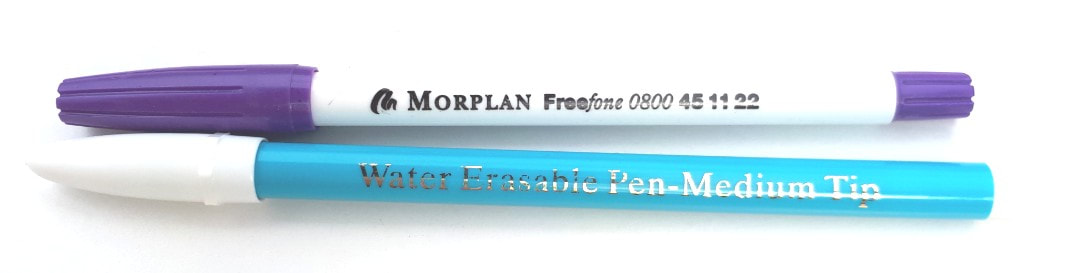 Back to the Good Old Days...Sometimes simple, old fashioned techniques work the best - yes, you can just use a pencil to mark your design! A good old HB! Bear in mind though, that although it will rub off paper, it won't rub off fabric, so you'll need to stitch over your design completely.. And for dark fabrics? A sliver of soap leaves a clear and instant mark. Soap will wash out, but it also disappears over a few months due to the humidity in the air, and can also rub off if you handle the work too much. Tailors chalk is handy for temporary marks on silk and viscose.
My favourites? A fine gel pen if I'm sure it will be covered by stitching, otherwise I'll go for a heat eraseable Frixion pen or Sashiko marker.
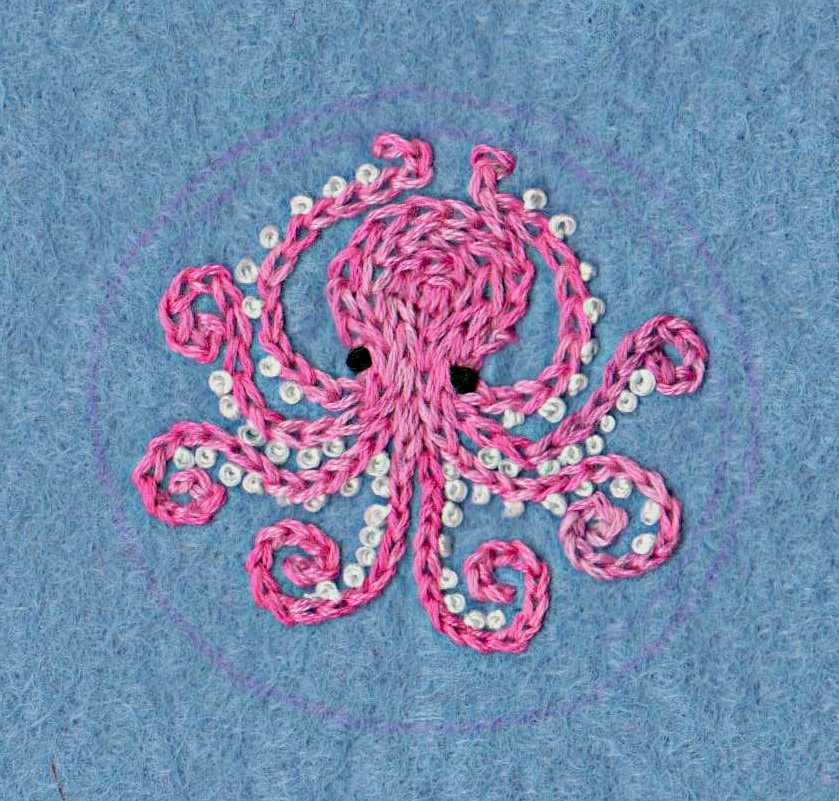 Have you ever tried?? I have picture the scene... it was the night before the first class of term, the only thing left to do was transfer this Octopus design onto a few pieces of felt for my students to start stitching the next day... and ALL of my go to methods failed me. Nightmare! The problem is that usual methods just don't work on felt. For a start, you can't see through it, so light box methods don't work. I had made stencils of my design, but it turns out that pens don't work at all because the felt is too, well, felty... or they bleed into the felt, so by the next day the pattern is well, just one big blob! Transfer pencil? Nope! Hopeless! The iron was so hot that it scorched the (acrylic) felt and only left the faintest of marks. So what happened? Well, many hours of trying, and I had a few half scorched, blurry Octopodes on some felt! And, a vow never to use felt for class again! But then, well, Xmas was coming, and you know, Felt and Xmas go together hand in crafty hand, don't they?! This time, I did my research well in advance, and finally, I found out about Sticky Fabri Solvy... Printable, Stickable, Washable! Perfecto! 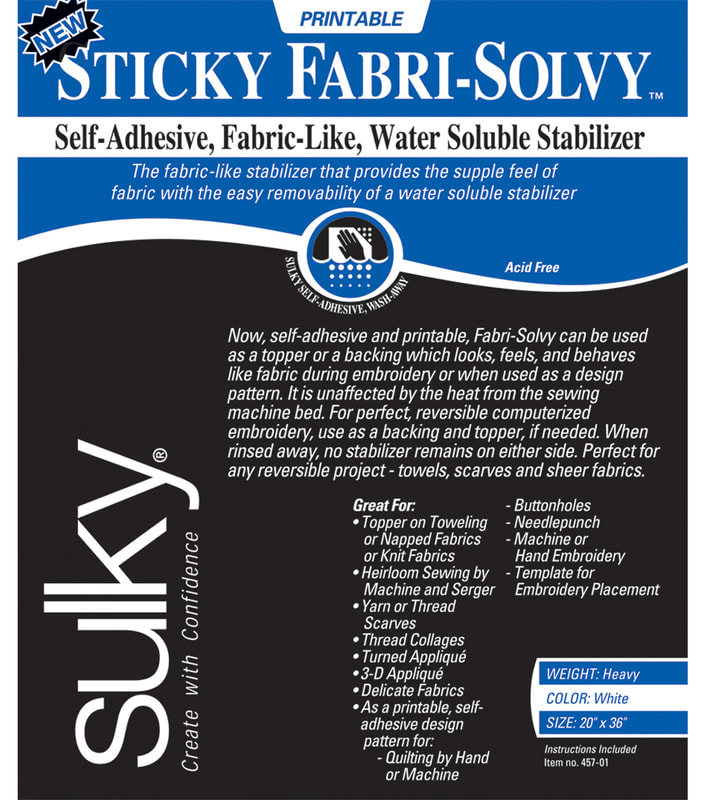 So how do you use it? It's soooo easy! You print (or draw) your design on to the Solvy, remove the backing, stick it onto your felt and stitch through it. When you've finished stitching, just soak the work in cold water, let it dry, and you're done! Pre-Shrink Your Fabric If you're using felt with wool content, soak it in cold water to pre-shrink it first. Roll it in a towel to remove excess water and let it dry flat. Transferring the Design: If you have a digital design all you need to do is use your computer printer to print onto a sheet of Solvy. You could also use a photocopier.
Stitching the Design
Finishing Once you've finished all your stitching, it's time to remove the Fabri Solvy
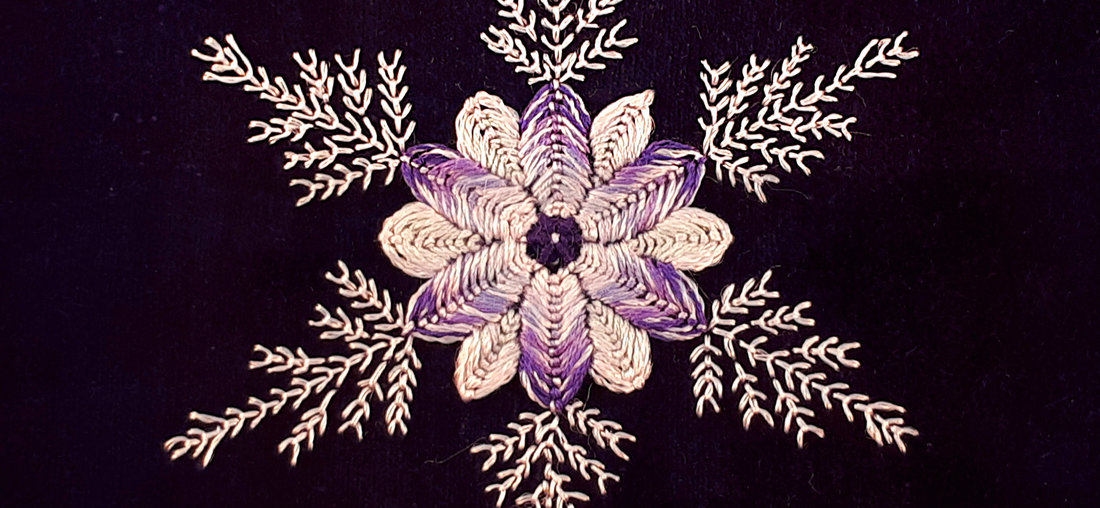 Ta da! Such a simple way to transfer designs to felt. It also works for other thick and napped fabrics, such as velvet, and also dark fabrics - or dark, and napped fabrics, like this Snowflake design worked on darkest purple fabric. Lush!
The only caveat is that if your fabric has loose dye, perhaps it's very dark, or it's hand-dyed fabric, the loose dye will stain your stitching when you wash the Solvy away... Aargh! I went along to my local Embroiderer's Guild 'Show and Tell' evening a while back, taking a piece of work that was finished, but still in the frame. I was quite surprised that most of the ladies were cooing over the back of the work, not the front! Apparently this was because the back of the work was so neat... if you know me in person, I'll give you a bit of time to get back up off the floor - 'neat' and 'tidy' are not words generally associated with me! In this post I'll give you some tips on how to keep your work tidy at the back, but first, I'll address the most important question - why bother? Folk only look at the front, don't they? 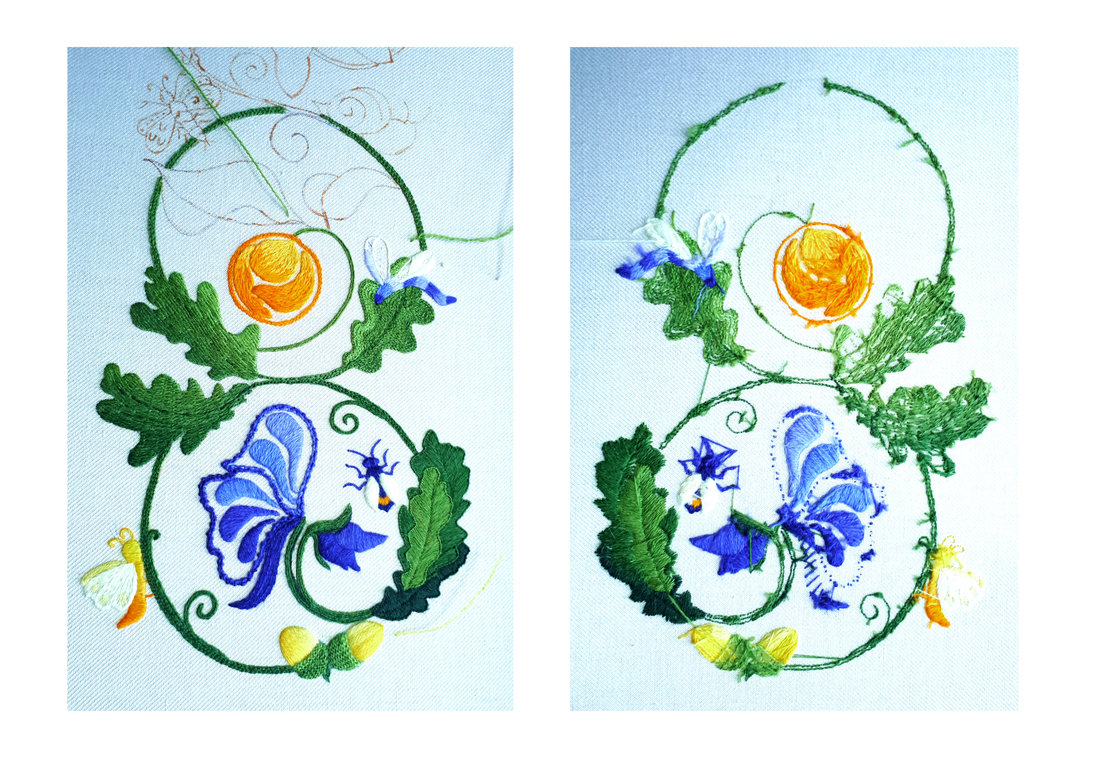 Front (left) and Back (right) of a WIP (work in progress) Yes! People only look at the front, unless you're teaching an embroidery class... or neglect to mount your work before taking it to the local Embroiderer's Guild Show & Tell! Apart from that, you can have a big a bird's nest on the back as you like... however, that bird's nest can affect the appearance of the front of the work in a few important ways:
Starting and Finishing Your Thread One of the reasons that the back of my work is neat is that I use the "Lost knot Technique" to start and finish my thread. I learnt this at the Royal School of Needlework, and it was a bit of a revelation! I had been taught to use a regular knot by my Grandma, and I'd picked up the "weaving in" technique from Cross Stitch kits. A lot of folk blogging about Embroidery (and even on Craftsy!) are self-taught, and the trouble is that Embroidery books don't often tell you how to start and finish your threads, which means some people just make something up... Like the very maverick, "I'll just leave a long tail at the back of the work, and hope that somehow it will be magically sewn in and I won't have to worry about it!" This is definitely the worst technique as it creates a lot of loose thread at the back of the work, and it's soooooo frustrating, as the thread often comes right out with the first stitch! The stitches can also come loose over time, especially if you're stitching a garment or bag, as the thread is not properly secured. 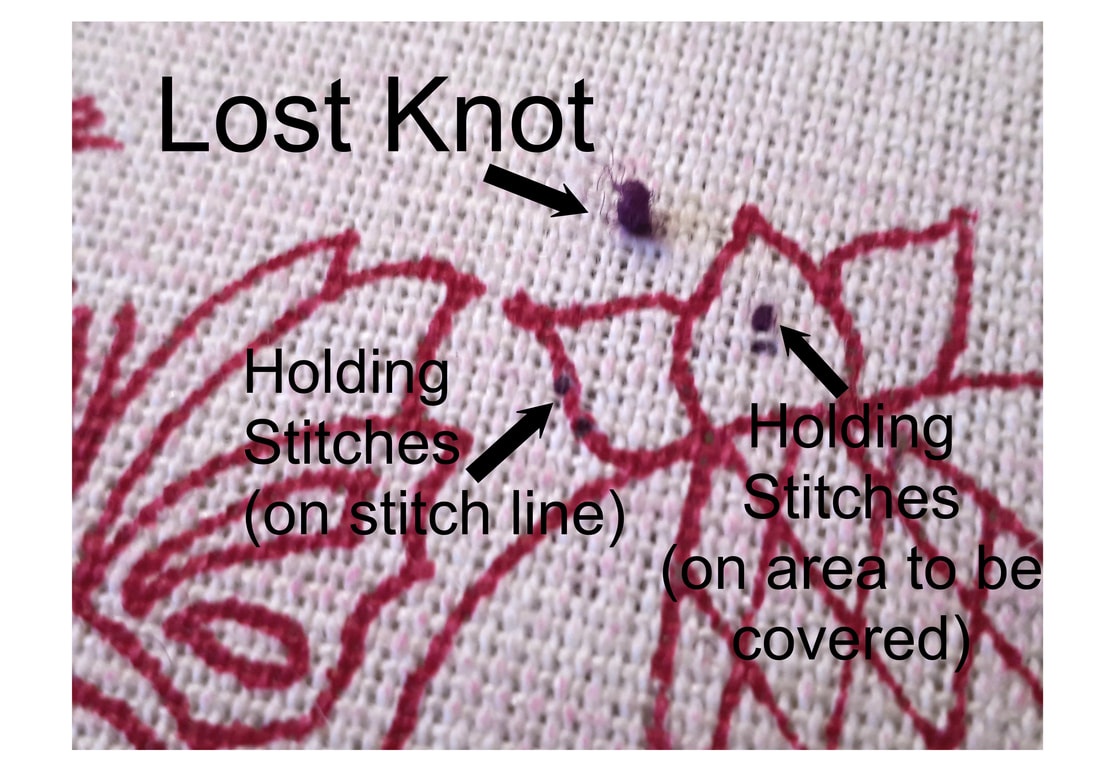 Lost Knot Technique So called because you start the thread with a knot, but lose it later!
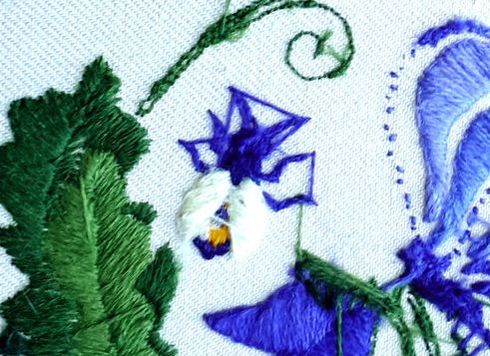 Thread stranded between the feet of the bee Stranding Your Thread If you are stitching a particular colour in one area of your pattern, and you're going to use that colour again in another part of the pattern, you can "strand it" across the back of the work. In other words, you can take a giant stitch across the back of the work and bring up your thread in another area, BUT.... your giant stitch shouldn't be more than about 1"(3cm) long! If you want to travel further than that you need to weave the thread through the back of the work. Very long threads stranded across the back of the work will cause the fabric to pucker up and not lie flat when you've finished. They can also make it harder to stitch in the areas that they cross over on their way to their final destination! 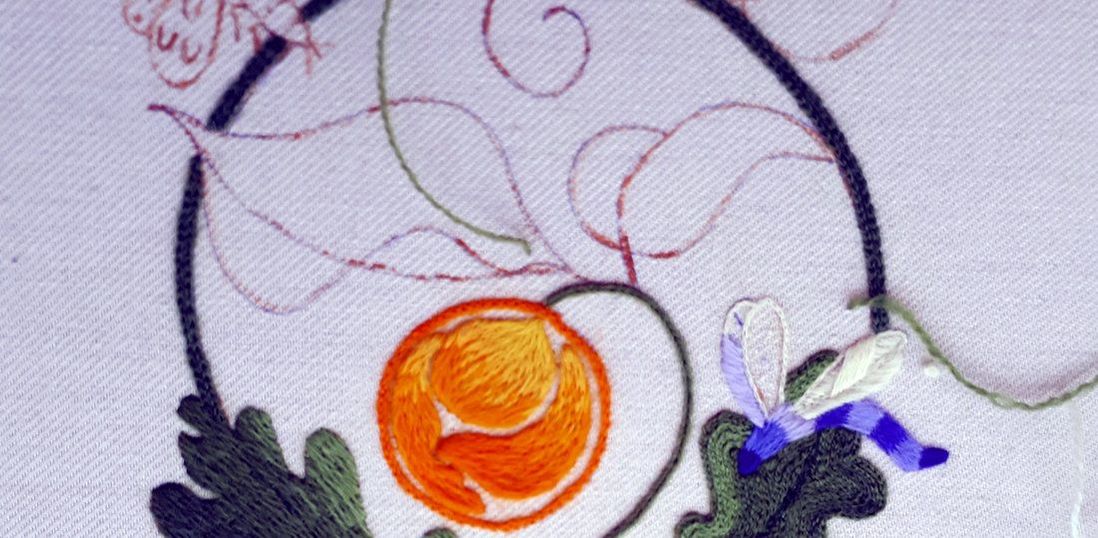 Green threads parked on the front of the work for later Parking Your Thread If you want to save a particular colour of thread for later, it can be tempting just to leave it dangling at the back of the work. The trouble with this is, that it gets in the way; it can get sewn in to the work, and it generally contributes to the creation of a bird's nest! It's much better to park your thread on the front of the work instead. Take your needle up to the surface and leave your thread somewhere on the edge of the work. Make sure it's not going to run under an area that you're about to work, or it will get stitched in. Don't leave too many parked threads on the surface - they'll only get sewn into the back of the work and become too short to be useful, as well as creating a bit of a mess. If you come to one of my classes, you may see some of my WIPs with lots of parked threads all over the place - this is just a result of demonstrating lots of different techniques in a short space of time, and I don't do this at home! If you have lots of parked threads, it's probably time for a bit of a tidy up. Finish them off by working those areas of the design, or finishing the thread and discarding them. Using excessively long pieces of thread
You might like to read my blog post on "How long is a piece of thread?" A: 40cm, if you don't want to read it! One of the issues with using thread that is too long is that it wears thin and/or knots. This can create loops at the back of the fabric that you don't notice until it's too late! Thread that breaks needs to be woven in, which is not a terrible thing, but if you really want the back of the work to be super neat, then you'd want to avoid weaving in altogether. So, there you go! That's my guide to keeping your work neat on both sides of the fabric. The most important thing however, is to enjoy your stitching - don't worry too much what the back looks like! Tara x I hope you found my last post about Embroidery Stands helpful, in this tutorial I'm going to give you step-by-step instructions on how to frame up your fabric on a roller frame (or a slate frame) ready for stitching! Why do I need to use a Frame? It's best to work your embroidery with the fabric stretched taught in a frame. This makes it easier to stitch and it prevents the fabric from distorting and puckering. When the finished piece of embroidery is framed in a picture frame, the fabric will also be stretched taught, so if you work the embroidery with the fabric stretched taught then it will look exactly the same when you then put it in the picture frame. Fabric, unlike paper, has a mind of it's own, so it is necessary to control it, otherwise it really will do it's own thing! Roller Frames Vs Hoops Hoops are great for small, quick projects but the downside is that:
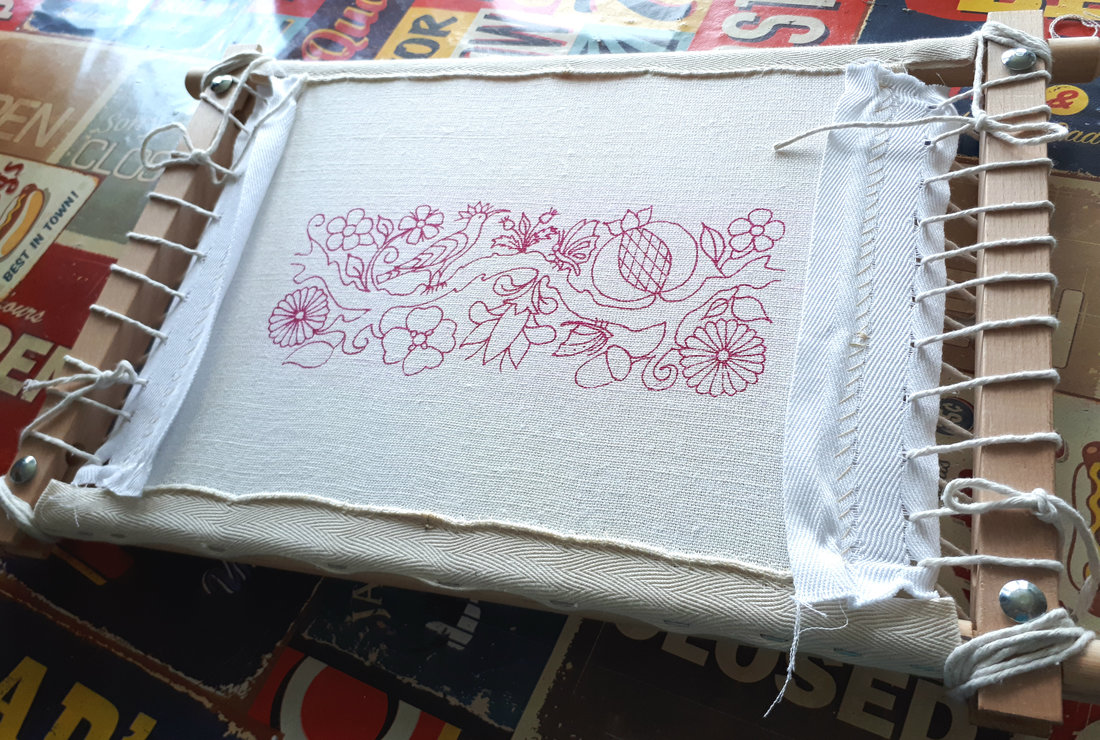 Step 1 - Iron the fabric! Sorry! It really is best to iron the creases out of the fabric before you begin, at least the worst ones... Small creases disappear when the fabric is stretched, but they reappear when you take the fabric out of the frame :o( This isn't too terrible, as long as you're going to stretch the finished embroidery over card and put it in the frame, smaller creases should disappear again. The one thing you don't want to do, however, is iron the creases out once you've done your embroidery - all your lovely stitching will be squashed! If you have a Jacobean Rainbow Kit, which is printed on linen, you'll need to have the iron set on linen, or triple dots (the highest setting), and you'll need lots of steam, a water spray or a damp press cloth as it's hard to get the creases out of linen. I recommend ironing from the back of the work, that way if there's any goop on the iron then it won't affect your finished piece. Step 2 - Sewing your Fabric to the Rollers If you're working a Jacobean Rainbow Kit, your printed fabric will sit landscape-wise within your frame. You'll need:
Counter- Intuitive Warning - the next step is counter-intuitive! 4. Lift the tape on the roller up slightly, and match the mark on the tape to the mark on the fabric - with the raw, folded edge trapped in between - and pin it. If you do dressmaking or soft furnishings this will seem really odd! 5. Pin all the way from the centre to the right hand side, and then all the way from the centre to the left hand side. The tape, pins and edge of the fabric will all stick upwards! 6. Take a long piece of your extra-strong or buttonhole thread (from your thumb to your armpit, plus a little bit), and run it through some wax (if you have it). This strengthens the thread a little bit and will help to stop it from getting knotted up. 7. Starting in the middle of the tape (this stops the fabric shifting too far to the left or right as you stitch), you're going to start stitching the fabric to the tape. You can start with a knot, and then work a cross stitch to begin, and then a second cross stitch over the top (see photo below) 8. Stitch along the tape to the left, removing pins as you go. You're going to oversew the fabric to the tape, alternating the depth of the stitches 3mm/5mm. Do this by pushing the needle through the tape and fabric from the tape side and drawing the needle and thread through. Then shift to the left about 3mm and push the needle through the tape and fabric from the tape side and drawing the needle through - the thread will loop over the top and then be drawn through, leaving a straight or slightly diagonal stitch, perpendicular to the edge of the fabric. The stitches should have the same spacing left to right, but be different lengths (3mm/5mm) up and down - see photos. 9. When you get to the end of the tape, go back over your stitches for about an inch (2-3cm), and then secure the thread with a couple of tiny back stitches. (see photo) 10. Repeat steps 7 - 9 working from the middle to the right. 11. Repeat steps 1-10 to stitch the other side of the fabric to the other roller - if your Feline Overlord will allow it, of course! Step 3 - Securing the fabric to the side bars Now you need to assemble the frame, sew some tape onto the vertical sides of the fabric (the short sides if you're working a Jacobean Rainbow Kit), and then lace the tape to the side bars of the frame with some string. After that you'll tension your fabric so it's as tight as a drum! 1. The first thing you need to do is put the rollers into the sidebars and assemble the frame. It's best to do one roller at a time, and push the roller into the sidebar at each end. Once you have one roller in place, twist it so that the fabric hangs slightly inside the frame. Then put the second roller in position at both ends, before pushing one end, and then the other into the side bars. This can be a bit of a struggle, so you might need some help if you don't have a lot of strength in your hands. 2. Tighten the wingnuts on the side bars at either end of the bottom roller. Twist the top roller back so that the fabric is tensioned and then secure the wingnuts at either end of the top roller. 3. Sewing tape onto the vertical sides of the fabric. You'll need:
5. Take a long piece of your extra-strong or buttonhole thread (from your thumb to your armpit, plus a little bit), and run it through some wax (if you have it). This strengthens the thread a little bit and will help to stop it from getting knotted up. Counter- Intuitive Warning - the next step is counter-intuitive! You're going to stitch the tape onto the fabric with horizontal stitches, 1cm in from the edge of the fabric (not the tape). You may want to mark a double line on the tape to keep your stitching straight - you don't want to get too near the edge of the fabric, or the tape will come off when you lace it, and you'll have to start again. 6. Secure your thread at the bottom of the tape, with a couple of horizontal back stitches. Make sure that your stitches are 1 cm in from the edge of the fabric - you'll need to turn the frame over to check - see photos. 7. Take a stitch, about 1cm above these holding stitches, and about 1cm wide, picking up the tape and the fabric. Repeat this stitching, all the way to the top of the tape. Secure the thread with a couple of back stitches. The stitching may cause the fabric to tunnel (form a ridge), but this doesn't matter. Lacing the fabric onto the frame To keep the fabric taught from side to side, you need to lace the fabric onto the sidebars of the frame. You'll need:
8. Keeping the roll of string attached, pull a long piece of string out and thread the needle. 9. Starting about 1" (2.5cm) from the bottom of the tape, take the needle through the tape only (not the fabric) from the topside, and draw through the string. Bring the string up on the outside of the roller frame and take the needle back down through the tape about 1" (2.5cm) above the previous stitch, from the topside, so that you loop the string around the side bar. Repeat this all the way to the top, pulling more string off the roll as you need it. You'll need a long length (about 50cm) to secure the string at each end (you can now cut the roll of string off!). Tensioning the fabric Next you're going to tension the fabric by tightening the rollers and pulling up the lacing. 10. Start by pulling up the string to take any slack out of it. 11. Secure both ends by wrapping it around the 'corner' of the frame a few times (see photos) 12. Finish by tying a slip knot to one of the strings 2 or 3 inches from the bottom of the tape. To tie the slip knot, thread the string around one of the lacings, creating a circle. Then form a loop in the working part of the string, and push it up into the circle. Pull the loop to tighten. Pull the free end to release the knot. 13. Tighten the rollers by loosening the wing nuts on the top roller, and twisting the roller back to put more tension onto the fabric. The frame might creak, but that's okay! Tighten up the wingnuts without releasing the tension on the fabric. 14. Release one end of the string from the sidebars - pull the slip knot out and unwind the string from the corner. Starting at the opposite end pull any slackness out of each lacing and work your way down to the free end. Keeping the tension in the free end of the string, repeat this, taking more slack out of the string and then secure it by wrapping it around the corner and tying a slip knot. 15. Repeat step 14, with the other 3 corners. Keep working sequentially around the frame until the fabric is tight as a drum! Checkout this demo video: 16. Ta Da! You're now ready to start stitching!
Tip - Keep your work clean and dust free, by storing it in a pillow case. 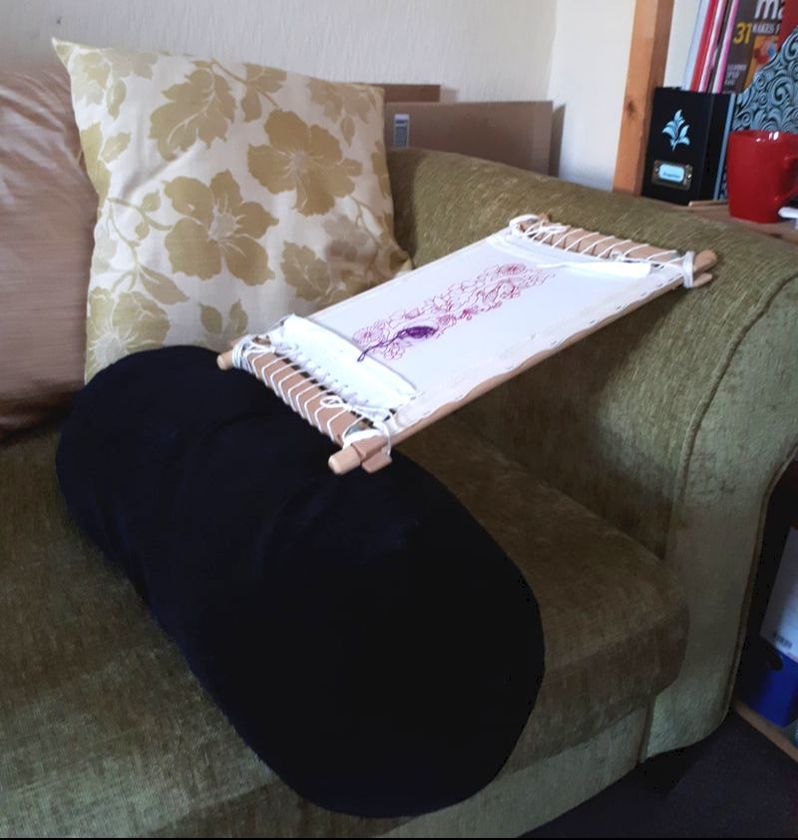 I pretty much always work my embroidery pieces with some kind of stand, so I thought you might like to know a bit more about them - I've reviewed a few of the ones that I've tried below. If you want to buy one, click on the image and it should take you to the retailer's website - I don't make any money that way, so these are genuine reviews! Why do I need an Embroidery Stand? You don't need an Embroidery Stand, but they do help you to retain good posture and that means that you can stitch for longer! I've been a dance teacher for many years, so I'm very keen on maintaining good posture while I stitch to reduce stress on my neck and shoulders, especially during long periods of stitching. I've included a link to one of my favourite neck and shoulder yoga videos at the bottom too! Happy Stitching! Tara x Free and easy... If you're new to embroidery and are just checking it out, or you are staying away from home, this is an easy way to work. Prop the left end of your frame on the arm of the sofa, or a table perpendicular to your seat, and rest the right end in your lap (illustrated by the cushion in the photo!). This means that you're left hand is in position underneath, and your right hand is on top, ready for stitching! If you're left handed then pick the position that's most comfortable for you. 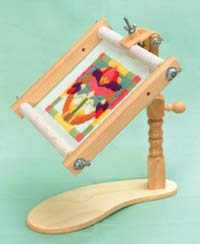 Lap Stand with Clamp or Hoop I like this lap stand for small informal projects and settings. It works ok with small roller frames (12 x12 or less) and it's great for hoops. It's easy to put together and take apart, so it's great for travelling as it will fit into a bag with your project and you can use it pretty much anywhere you have a seat! It's great for workshops and train journeys, as well as sitting outside in the garden.  Opus Floor Stand I like this stand for small/medium projects and it works well with roller frames, and other rectangular frames. It also works with hoops. It's my go to stand when I'm teaching as it folds down which makes it easy to transport, and my students can stand around it making it easy for them to see what I'm doing. Some of my students also bought this stand and found it useful for bringing to class. It's easy to flip the frame over to get to the back of the work, and it also works if you've put your project in the frame portrait style. It's a good height for sitting on the sofa with too... Getting your work in and out of the clamp can be a bit faffy, but it's okay. We had a problem with it sinking down with the weight of the roller frame, and this was due to the manufacturer making the middle section in soft wood (the rest of the frame is hard wood) which meant that the stay bolts didn't stay properly. I don't know if this has been corrected or not, but we were able to get the softwood section replaced with hardwood. It also bounces slightly when you work, however despite these flaws, I do really like it! 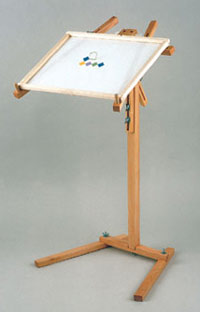 Stitchmaster Floor Stand I like this stand for smaller projects and it works well with roller frames, and other rectangular frames. It's less good with hoops, especially smaller ones. Once it's assembled it's easy to use - you just sit the frame on the stand and it rests of two pegs - no clamping required. It's a good height for sitting on the sofa with too... I find the frame slips around a little bit, which is a problem sometimes, but it's equivalent to the bounce that you get with the opus! You can also buy lamps and magnifiers to go with it. They do a lap stand version which some of my students have tried, but they didn't get on too well with it. 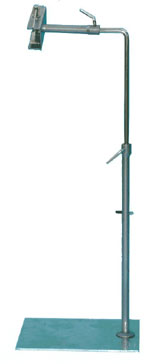 Lowry Floor Stand I have to confess that I don't own one of these and I've never used one, although I have seen one in use at a workshop! I've included it here as it is reputed to be the Creme de la Creme of Embroidery stands! It is expensive, but it is supposed to be well designed and easy to use. I think that it comes with optional attachments (lights etc). 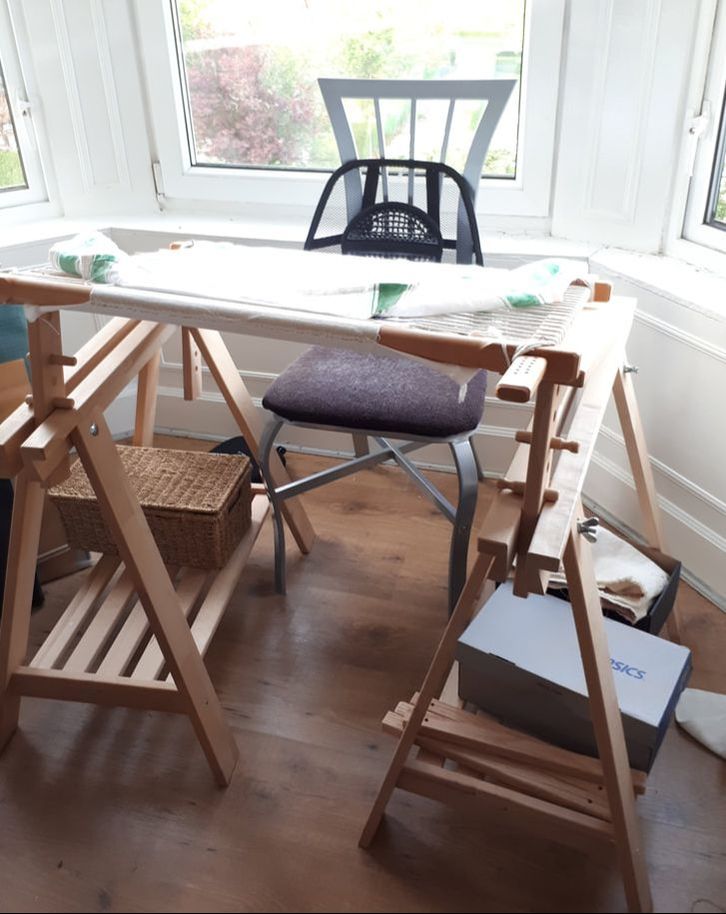 Slate Frame and Trestles If it's a big project that you're after doing, I recommend using a large slate frame. You'll need two trestles to support it and the Ikea Finnvard are ideal (and cheap!), I recommend getting them in Beech, not White. The white is some kind of paper composite material and the pegs on the slate frame dig into it easily. The Finnvard also come with a shelf which is really handy for storing your threads, scissors and reference books. That Yoga Video....
David Prosychen does really good, clear yoga videos for beginners, he's an experienced yoga teacher in real life, so you don't need to worry about whether he knows what he's doing or not. This is a great class for releasing your shoulders, arms and hands - so that you can do more embroidery of course! So.... is there really an ideal length for a piece of Embroidery thread? Why, yes, there is! It's about 40cm, or the length of your forearm - unless you're an Orangutan... as many of my students seem to be! My students generally complain that this is far too short, and means they have to keep threading up needles, but there is a good reason for keeping your thread nice and short. Embroidery thread is designed to be pretty and decorative, rather than strong. This means that as you stitch with it, it starts to wear thin and/or become tangled and knotted, so to keep your stitching looking even and luscious, you need to use short lengths of thread.  I'm sure you knew that Orangutans have really long arms for swinging about in the jungle, but did you know they're endangered? Palm oil plantations have wiped out large tracts of the Orangutans' habitat - click the picture to find out how you can help. I'm sure you knew that Orangutans have really long arms for swinging about in the jungle, but did you know they're endangered? Palm oil plantations have wiped out large tracts of the Orangutans' habitat - click the picture to find out how you can help. Thread manufacturers know this, so if you buy a skein of Stranded Cotton, Sashiko Cotton, or Crewel Wool, you can cut the whole skein in half and have all your threads at the perfect length before you start stitching. The thread can be plaited to keep it from getting tangled, or threaded back through the paper label, and stored in a Thread Roll. What about Cotton Perle? Well, something has to be the exception to the rule... Cotton Perle is a stronger, 2 ply, twisted thread, and yes, you can cut it a little longer. Perfect, if you're an Orangutan - and have extra long forearms! Instructions on how to make a Thread Roll to keep your threads nice and orderly are coming here soon... |
Tara Dakini Archives
December 2019
Categories |

 RSS Feed