Stem Stitch & Outline Stitch
Stem Stitch is a linear stitch with a rope like twist. It makes a thin line that follows curves easily. Rows of Stem Stitch can be worked closely together to form a filling stitch, also known as Crewel Stitch.
Jump to: Videos Direction Chart Photo Tutorial Trouble Shooting
If you're new to embroidery this stitch is a good one to start with. In embroidery having the thread lie correctly on the fabric surface in relation to the position of the needle is crucial to forming a stitch correctly. Stem stitch is easy to learn, and teaches you to be aware of where your thread is!
At a Glance...
|
|
Which Direction Chart!
|
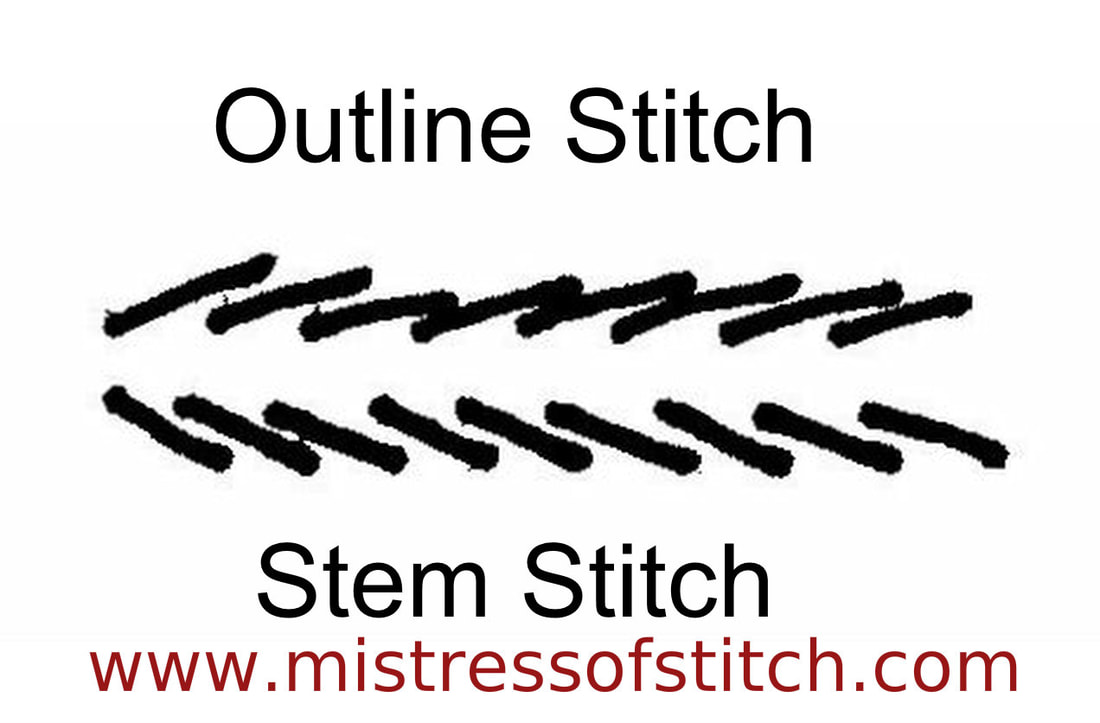
Stem Stitch
Working Downwards - Loop to the left Working Upwards - Loop to the right Working left to right - Loop down Working right to left - Loop up |
Outline Stitch
Working Downwards - Loop to the right Working Upwards - Loop to the left Working left to right - Loop up Working right to left - Loop down |
Photo Tutorial - Stem Stitch
1. Anchor your thread using the lost knot technique (see previous tutorial, Hints & tips on using Crewel Wool). You can see I've left the knot and my tiny holding stitches in an unworked area, because I know I'm going to stitch over them when I work the flower stem.
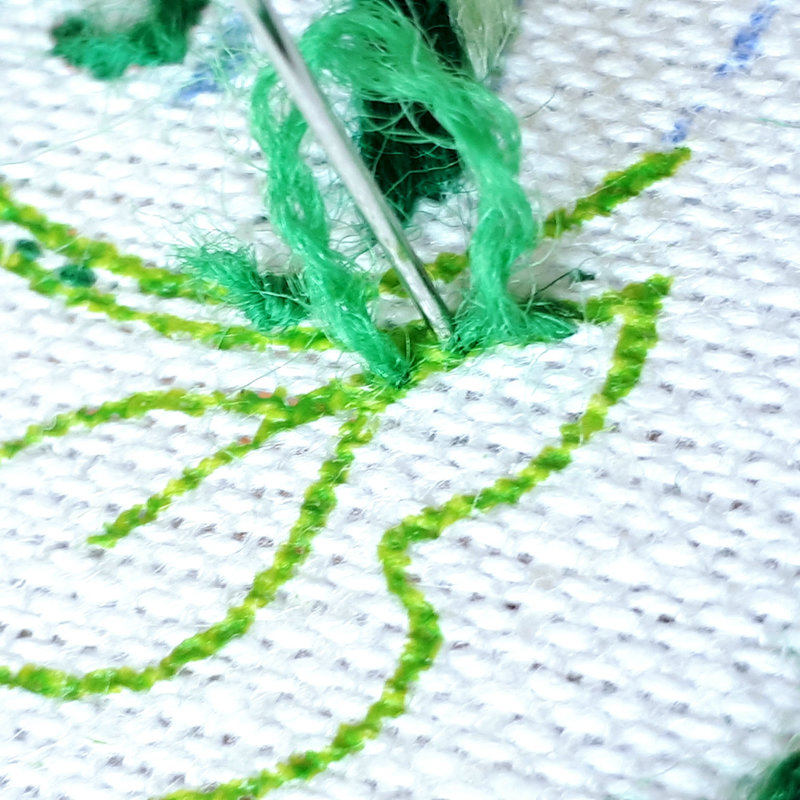
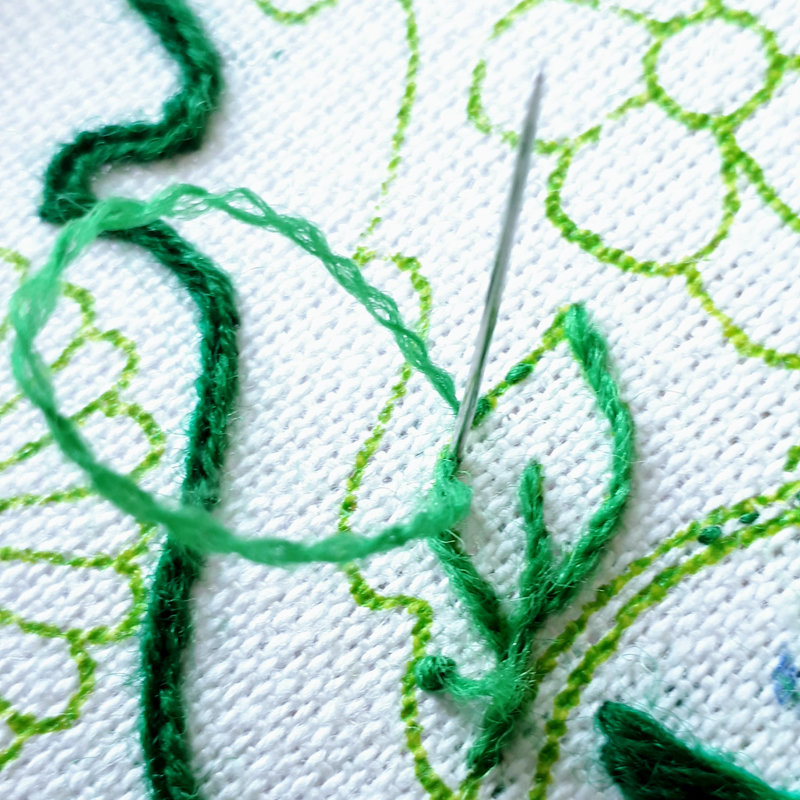
2. Bring the thread up at the bottom of the leaf stalk. |

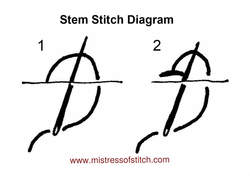
3. Insert the needle about 4mm (just over 1/8") up from the start point. Pull the thread through, but leave a loop on the surface of the fabric. Bring the needle up through the fabric, halfway between the beginning and end of the loop. Keep the loop to the right of the needle (if you're working vertically upwards, if not check the Direction Chart Above). This is very important, and gives the stitch it's charecteristic rope like twist. Pull the thread through to make the first stitch.
|

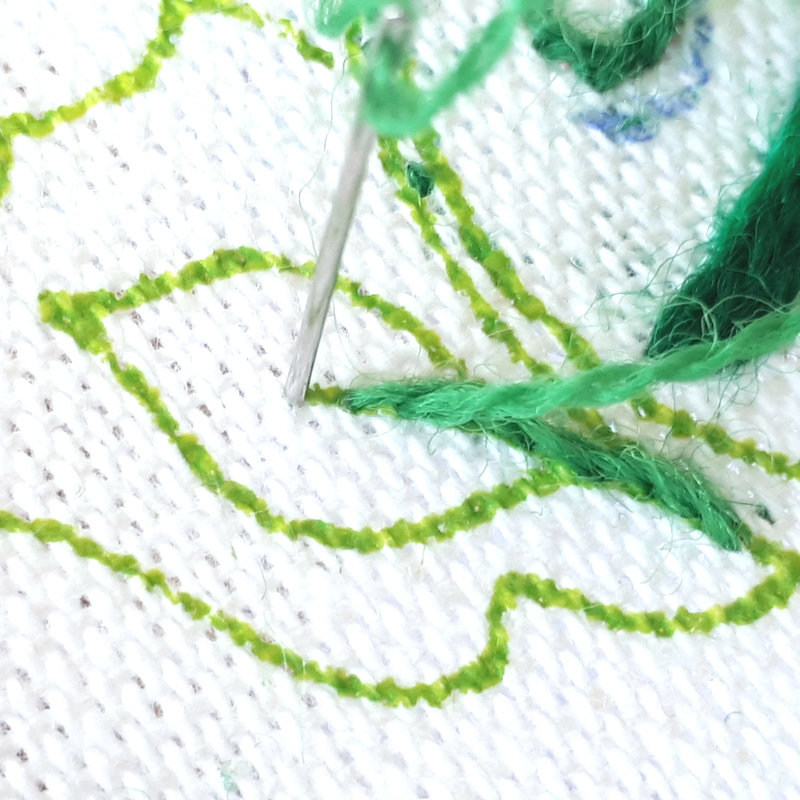
4. To make the second stitch, we're going to put the needle down through the fabric,half a stitch length above the end of the previous stitch. The stitches overlap each other, so although they are all the same length, from now on we're going to be focusing on the half stitch length gap from the end of the previous stitch.
5. Pull the needle and thread through, leaving a small loop on the surface of the fabric, to the right of the needle. |
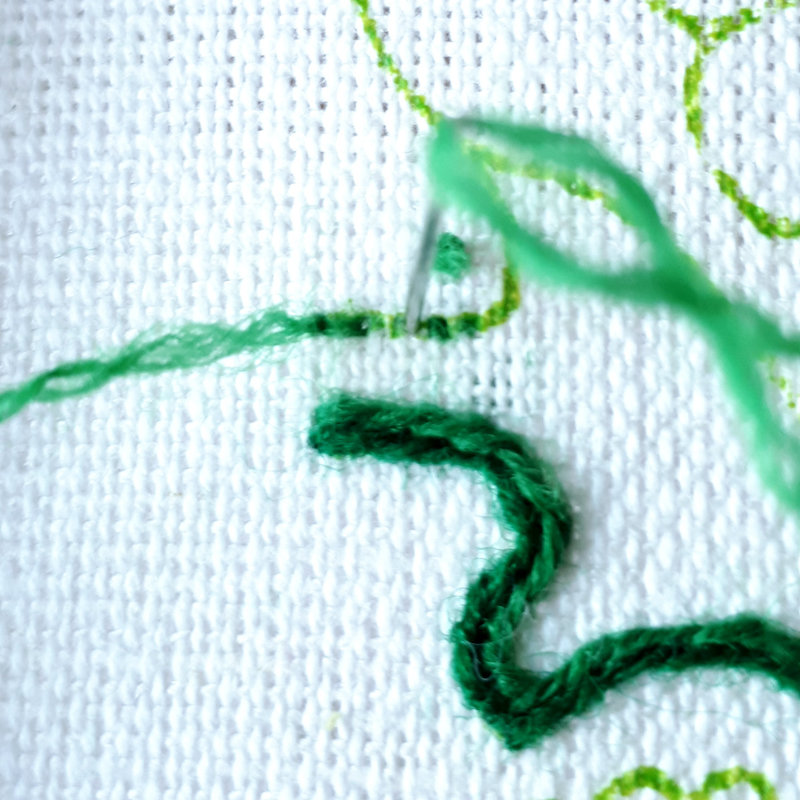
6. Bring the needle up at the end of the previous stitch - don't split the stitch, and don't leave a gap. Draw the thread though to complete the second stitch
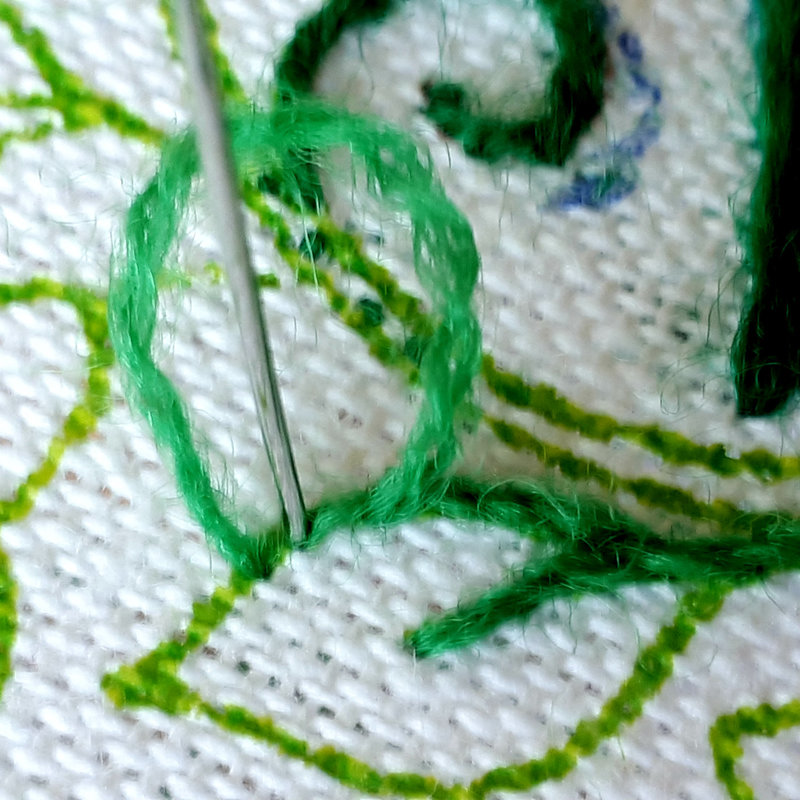
* Repeat Stitches 4,5,6 until you reach the end of the printed line * As you stitch, keep the thread consistent as the line changes direction. Check the chart above if you're unsure. |
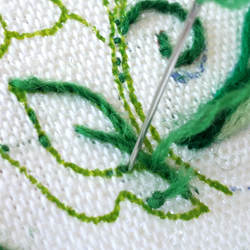
7. At the end of the printed line put the needle down through the tip of the line, still being roughly half a stitch length from the end of the previous stitch.
|
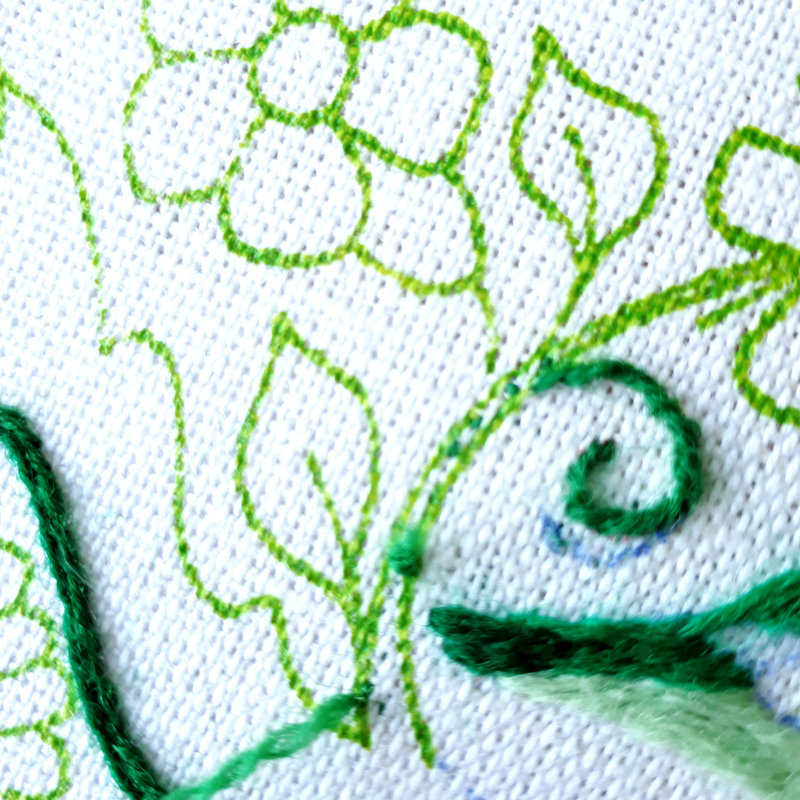
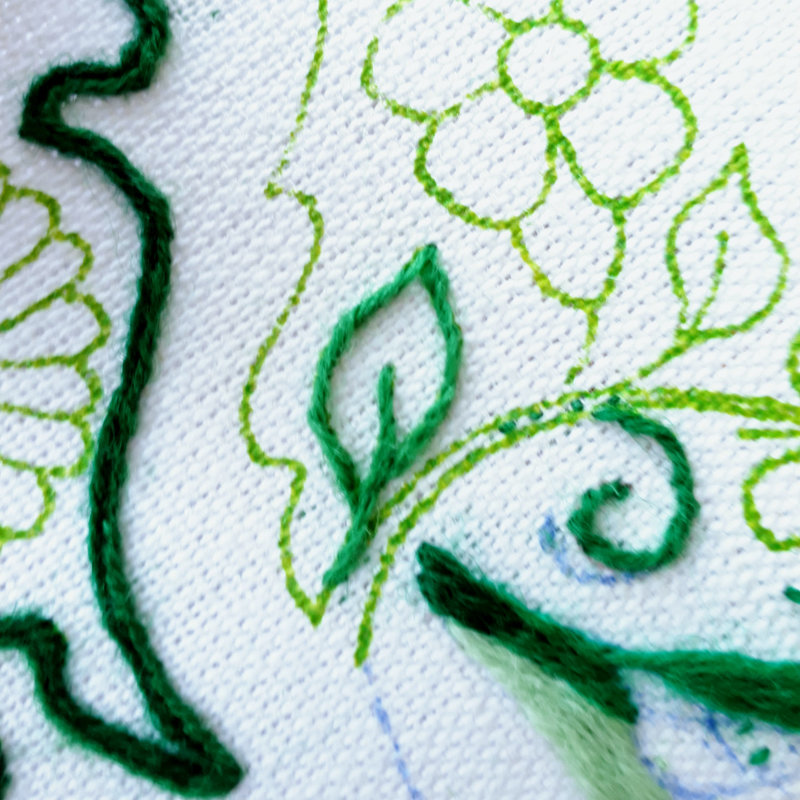
Curves
Stem stitch goes around curves really well. It works best if the thread is to the outside of the curve, as on the right hand edge of the leaf here. If the curve goes the other way, as in the left hand edge of this leaf, try using Outline Stitch instead. |
Photo Tutorial - Outline Stitch
Outline Stitch is the mirror image of Stem Stitch. In Stem Stitch the stitches lie in the direction bottom left to top right. In Outline Stitch the stitches lie in the direction top right to bottom left. To achieve this we keep the thread to the other side of the needle in Outline Stitch. See my handy chart above to work out which side of the needle your thread should be in whichever direction you're working!
1. Bring the thread up at the bottom of the line you wish to work. Insert the needle about 4mm (just over 1/8") up from the start point. Pull the thread through, but leave a loop on the surface of the fabric. (See picture left) Bring the needle up through the fabric, halfway between the beginning and end of the loop. Keep the loop to the left of the needle, (if you're working vertically upwards, if not, check out my chart above). This is what makes it Outline Stitch not Stem Stitch! Subtle, I know! Pull the thread through to make the first stitch.
|
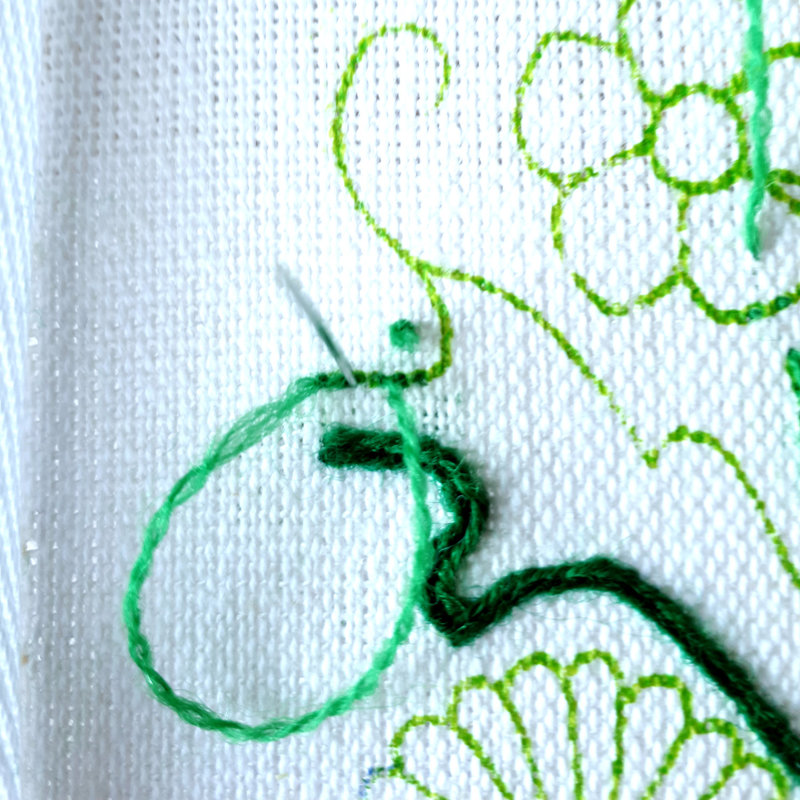
2. We're going to keep stitching in the same way as our Stem Stitch, but always with the thread to the left of the needle. So, put the needle down through the fabric, half a stitch length above the end of the previous stitch.
3. Pull the needle and thread through, leaving a small loop on the surface of the fabric, to the right of the needle. |
4. Bring the needle up at the end of the previous stitch - don't split the stitch, and don't leave a gap. Draw the thread though to complete the second stitch. Repeat steps 2,3,4 until you reach the end.
|
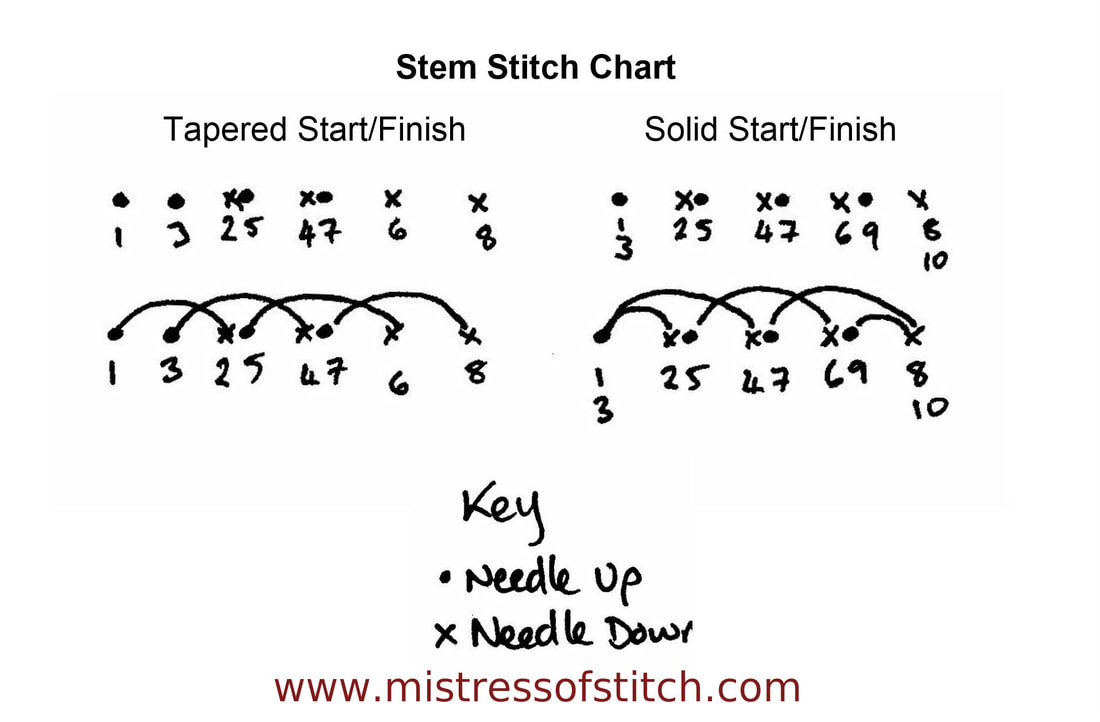
Beginnings and Endings
So far in this tutorial, we've been starting and finishing our Stem & Outline Stitch with a tapered end, this is the easiest way as it means the stitch is exactly the same from start to finish, but what should we do if we want a nice crisp, solid end, that means the line we've stitched has the same thickness all the way along?
Simply, we add a half stitch at the beginning and end of our line of Stem or Outline Stitch.
Simply, we add a half stitch at the beginning and end of our line of Stem or Outline Stitch.
1. Anchor your thread using the lost knot techniqe (see previous tutorial, Hints & tips on using Crewel Wool). You can see I've left the knot outside the design, and I've put my tiny holding stitches on the printed line, because I know I'm going to stitch over them in a minute.
2. Bring the thread up at the left end of the line you wish to work. 3. Take a small, straight stitch along the line towards the right. This should be about 2mm long (just under 1/8") |
4. Bring the needle up at the start of the vine again, but without splitting the half stitch. Take a full length stitch this time, over the half stitch. Pull the needle and thread through, leaving a small loop on the surface of the fabric.
|

5. Bring the needle up at the end of the half stitch - don't split the stitch, and don't leave a gap. Keep the thread below the needle this time, as we're working from left to right. Draw the thread though to complete the first full stitch.
So, put the needle down through the fabric, half a stitch length above the end of the previous stitch. 7. Pull the needle and thread through, leaving a small loop on the surface of the fabric, below the needle. 8. Bring the needle up at the end of the previous stitch - don't split the stitch, and don't leave a gap. Draw the thread though to complete the second stitch. Repeat steps 2,3,4 until you reach the end of your line. To finish with a solid end, take an extra half stitch to complete your line. |
Trouble Shooting
Why isn't my stitching very neat?

If your Stem Stitch didn't turn out as a nice even rope like like, but more like an unruly, knobbly twig like the example bottom left, here's what to do:
1. Make sure your stitches are the same size each time (except on adverse curves, where they need to be smaller).
2. Turn the work over - neat Stem Stitch will give you a nice even line of Back Stitch on the reverse (see above right), not an uneven Running Stitch (bottom right). To achieve the neat line of Back Stitch on the reverse, and perfect Stem Stitch on the right side, make sure that you take the needle through the same hole as the end of the previous stitch - don’t leave a gap, and don’t split the previous stitch.
There's no rope!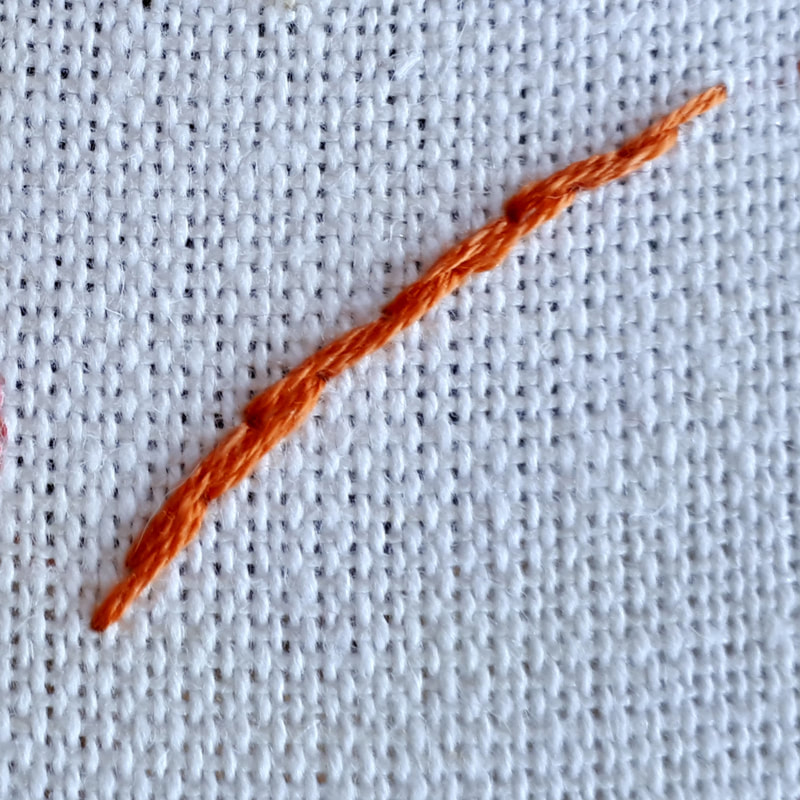
If your Stem Stitch didn't turn out like a rope at all, and looks something like this, what's happened is that you haven't kept the thread to the same side of the needle each time. In this example, the thread alternates with each stitch, leading to two sets of parallel stitches alongside each other.
Done in a regular manner, with the thread alternating each time, the stitch is called Double Stem Stitch, or Alternate Stem Stitch. |
My curves don't sit on the line!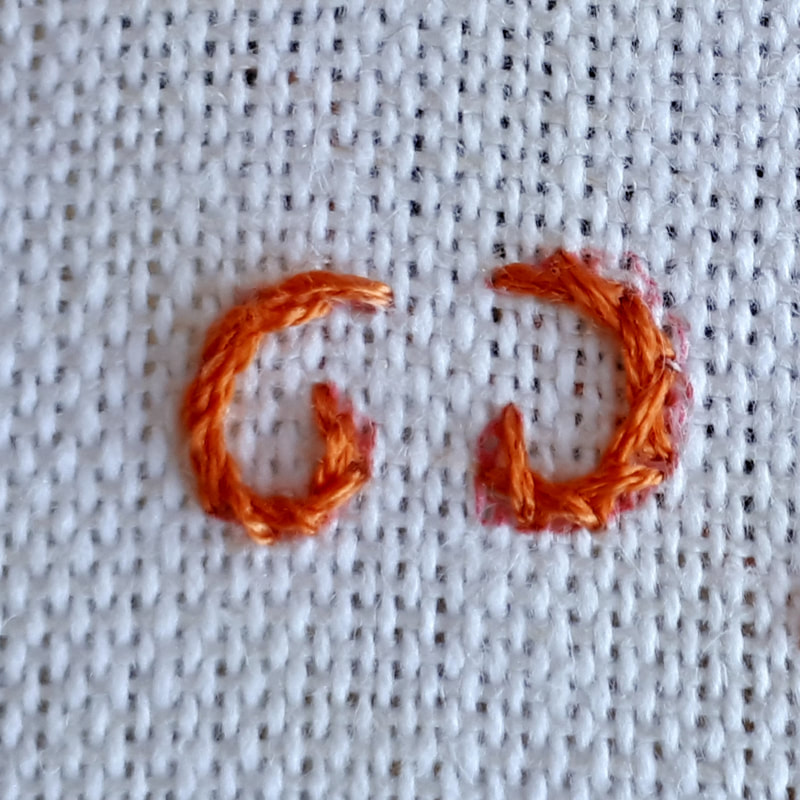
If you look at the examples above, the curl on the left is formed by a smooth line all the way around. The curl on the right however, has a criss-cross pattern to the right side. This is because Stem Stitch was used to stitch around a curve, but because of the direction of the curve, the thread was held over to the inside of the curve instead of the outside, causing the stitches to fall in towards the centre.
This can be rectified, either by using Outline Stitch, or by sticking with Stem Stitch and making the stitches much smaller. |
Why does my thread keep breaking??!
If you're using Crewel wool, remember that it is fine and delicate and it can wear and break before you've finished a thread. Some stitches wear the thread out more quickly, and Stem Stitch is one of those stitches! To reduce wear on the thread, it helps to pull the thread through along the surface of the fabric, rather than straight up. If you get too frustrated, take a break and come back to it. Remember, Crewel wool should be cut to about 30cm, to minimise wear and tear.
If you're using Crewel wool, remember that it is fine and delicate and it can wear and break before you've finished a thread. Some stitches wear the thread out more quickly, and Stem Stitch is one of those stitches! To reduce wear on the thread, it helps to pull the thread through along the surface of the fabric, rather than straight up. If you get too frustrated, take a break and come back to it. Remember, Crewel wool should be cut to about 30cm, to minimise wear and tear.